Author: pvadmin

  • ctm interpreter

    Introducing the CTM Interpreter CLI for Ringsce SDK

    🚀 A powerful CLI tool for macOS and Linux (ARM64) to manage, update, and sync the Ringsce SDK


    🔹 What is the CTM Interpreter CLI?

    The CTM Interpreter CLI is a command-line utility designed to automate the synchronization and build processes for the Ringsce SDK. It is optimized for macOS and Linux (ARM64) and serves as the primary tool for maintaining and updating the Ringsce SDK from its main project repository, tilde-desktop.


    🌍 Key Features

    Sync the SDK with the latest updates (--sync)
    Clone and update repositories from GitHub
    Commit and push changes seamlessly (--commit "<message>")
    Build the SDK from source using make (--build-from-source)
    Reset the project repository and resync (--reset)
    Fully compatible with macOS and Linux ARM64 systems


    ⚙️ How It Works

    1️⃣ Clone the Ringsce SDK Repo

    ./ctminterpreter https://github.com/ringsce/tilde-desktop.git

    2️⃣ Sync the Latest Changes

    ./ctminterpreter --sync

    3️⃣ Commit & Push Code Updates

    ./ctminterpreter --commit "Updated SDK with latest features"

    4️⃣ Build the SDK from Source

    ./ctminterpreter --build-from-source

    5️⃣ Reset & Resync the SDK Repository

    ./ctminterpreter --reset

    🔗 Official Resources

    🌐 Website: ringscejs.gleentech.com
    📂 GitHub: github.com/ringsce
    🚀 Main Repository: tilde-desktop

    Stay updated with the latest developments and contribute to Ringsce SDK today! 🎯

  • Kayte Lang for apache2

    Kayte Lang: Now Fully Compatible with Apache2

    We are thrilled to announce that Kayte Lang, our innovative programming language designed for versatility and performance, is now fully compatible with Apache2 web servers. This milestone makes Kayte Lang even more accessible for web developers and enthusiasts who want to harness its power in server-side applications.

    Why Apache2 Compatibility Matters

    Apache2 is one of the most widely used and trusted web servers globally. By enabling Kayte Lang to run seamlessly in an Apache2 environment, we empower developers to:

    • Expand Their Toolkit: Integrate Kayte Lang’s unique features into existing web applications.
    • Leverage Apache2’s Robust Features: Combine Kayte Lang’s speed and simplicity with Apache2’s proven performance, scalability, and security.
    • Deploy Quickly: Use .kayte files alongside .php files without additional setup or tools.

    How It Works

    Kayte Lang files (.kayte) are processed as PHP files, allowing them to leverage the full power of PHP while retaining Kayte Lang’s syntax and benefits. Here’s how the integration works:

    1. Apache2 Configuration: .kayte files are set up to be handled by the PHP interpreter in Apache2. This ensures smooth execution of Kayte Lang scripts.
    2. Native Syntax Support: Developers write in .kayte files just as they would in .php files, with Kayte Lang’s unique features.
    3. Seamless Deployment: Upload .kayte files to your web server, and they will execute like standard PHP files—no special runtime required.

    Getting Started

    To start using Kayte Lang with Apache2:

    1. Install Apache2: Ensure you have Apache2 and the PHP module installed on your server.
    2. Configure Apache2 for Kayte Lang: Modify the Apache configuration to recognize .kayte files.
    3. Write and Deploy: Create .kayte files and upload them to your server.

    For a detailed guide on setting up Apache2 for Kayte Lang, check our documentation here.

    Key Features of Kayte Lang on Apache2

    • High Compatibility: Works alongside existing PHP applications.
    • Performance-Oriented: Designed for efficiency in server-side operations.
    • Extensibility: Easily integrates with databases, APIs, and modern web technologies.
    • Lightweight and Intuitive: Perfect for both small scripts and complex server-side logic.

    What’s Next

    The integration of Kayte Lang with Apache2 is just the beginning. Our roadmap includes:

    • Native Support for More Servers: Including Nginx and IIS.
    • Enhanced Debugging Tools: To simplify development workflows.
    • Kayte Framework: A lightweight framework tailored for rapid application development in Kayte Lang.

    Join the Kayte Lang Community

    We are excited to see what you’ll create with Kayte Lang and Apache2! Share your projects, feedback, and ideas with the growing community of Kayte Lang developers.

    Visit Kayte Lang’s official website to learn more, access resources, and download the latest version.

    Let’s redefine server-side development together with Kayte Lang!


  • Ekron Realms tooclchain

    To use Ekron Realms with Freepascal and Lazarus use this tool to update your compiler. If you update the cross for arm64 ios and arm (32 bit) you will be able to compile for iOS. I will teach how to use Android also. For now iOS.

    In the next tutorials we will learn how to build Ekron Realms for macOS silicon and iOS, Android for your needs. We are going to learn how to use rings Engine for the games.

    See you soon…

  • Kayte Lang

    # Kayte Lang PoC: A New Programming Language for Custom Applications
    
    **Kayte Lang** is a lightweight and dynamic programming language designed for flexibility and efficiency. The language aims to simplify application development by offering a minimalistic yet powerful syntax for both logic and UI components. This article presents the Proof of Concept (PoC) version of Kayte Lang and its core features, showcasing its potential for building modern applications.
    
    ## Why Kayte Lang?
    
    Kayte Lang was created with the goal of balancing simplicity and power in programming. It is perfect for rapid development while still maintaining enough flexibility to scale for larger projects. Whether you're building desktop applications, mobile apps, or even cross-platform UI components, Kayte Lang offers a clear and structured approach to development.
    
    ### Key Features of Kayte Lang PoC
    
    1. **Simple and Intuitive Syntax**: Kayte Lang provides an easy-to-learn syntax, lowering the barrier for new developers while supporting complex programming patterns.
    2. **Bytecode Compilation**: Kayte Lang scripts are compiled into bytecode, which is then executed by the custom Kayte Virtual Machine (VM). This ensures efficient execution across multiple platforms.
    3. **UI Component Definition**: Kayte Lang allows developers to define UI components using XML and DTD, creating a structured and reusable approach to UI design.
    4. **Lightweight Virtual Machine (VM)**: The Kayte VM is optimized to run Kayte bytecode, ensuring efficient resource management and performance.
    5. **Cross-Platform Support**: Kayte Lang can be compiled and executed on multiple platforms, including iOS, Android, macOS, Windows, and more.
    
    ## Syntax Overview
    
    Kayte Lang’s syntax is designed to be simple yet versatile, supporting common programming paradigms like object-oriented and functional programming.
    
    ### 1. Functions
    
    Functions in Kayte Lang are defined using the `function` keyword.
    
    ```kayte
    function greet() {
        print("Hello, World from Kayte Lang!");
    }

    2. Variable Declaration

    Variables are declared using the `var` keyword.

    var name = "Kayte Lang";

    3. Conditional Logic

    Conditional statements are handled using `if` and `else`.

    if (name == "Kayte Lang") {
        print("Welcome to Kayte Lang!");
    } else {
        print("Unknown language");
    }

    4. Loops

    Kayte Lang supports `for` loops for iteration.

    for (var i = 0; i < 10; i++) {
        print(i);
    }

    5. Error Handling

    Error handling is done using `try` and `catch` blocks.

    try {
        var result = riskyOperation();
    } catch (error) {
        print("An error occurred: " + error);
    }

    Example: A Simple Kayte Lang Script

    Here's an example of a simple UI script written in Kayte Lang:

    window main {
      title: "Kayte Lang Demo"
      width: 800
      height: 600
    
      content {
        button {
          id: "btnClickMe"
          text: "Click Me!"
          onclick: showMessage()
        }
      }
    }
    
    function showMessage() {
      print("Button clicked!");
    }

    This script defines a basic window with a button that prints "Button clicked!" to the console when clicked.

    Bytecode Compilation and Execution

    Kayte Lang compiles its source files into bytecode, which is then executed by the Kayte Virtual Machine. The VM ensures cross-platform compatibility and optimized performance.

    Bytecode Example

    Below is an example of how a Kayte Lang script gets compiled into bytecode.

    BYTECODE INSTRUCTION SAMPLE:
    LOAD_CONST   0 (Button clicked!)
    CALL_FUNCTION 1
    RETURN_VALUE

    This makes it possible to run Kayte Lang scripts efficiently on multiple platforms without the overhead of high-level interpretation.

    UI Component Definition

    One of the standout features of Kayte Lang is its ability to define UI components using XML and DTD. This method ensures that the UI is both structured and easily maintainable.


    With this structured format, complex UIs can be built and maintained in a consistent and readable way.

    Roadmap for Kayte Lang

    Kayte Lang is currently in its Proof of Concept phase, but there are ambitious plans for future development, including:

    • Advanced Type System: Adding support for a stronger type system to improve safety and performance.
    • Optimized VM: Further enhancements to the Kayte VM to boost speed and efficiency.
    • Standard Libraries: Expanding Kayte Lang’s ecosystem with libraries for common tasks like file handling, networking, and more.
    • Cross-Platform UI Toolkit: Developing a unified UI framework to build applications for multiple platforms with a single codebase.

    Get Involved

    Kayte Lang is an open-source project, and contributions are welcome! Whether you're interested in improving the language, building libraries, or providing feedback, you can get involved.

    GitHub Repositories:

    By contributing to these repositories, you can help shape the future of Kayte Lang.

    Conclusion

    Kayte Lang is a promising new language that simplifies modern application development without sacrificing power or performance. With its clean syntax, bytecode execution, and cross-platform support, it has the potential to become a valuable tool for developers across various domains.

    As Kayte Lang continues to evolve, its flexibility and ease of use will make it a compelling choice for developers looking to build both simple and complex applications.

    Stay tuned for more updates as Kayte Lang moves beyond its PoC phase into full-scale development!


  • KreatyveBot #2

    Building an IRC Server in Perl: A Comprehensive Guide For Kreatyve Tools

    Internet Relay Chat (IRC) has been a cornerstone of real-time communication on the internet for decades. Although many modern applications have emerged, IRC remains popular among developers and communities who appreciate its simplicity and efficiency. In this article, we'll explore how to create a basic IRC server using Perl, a versatile scripting language known for its text processing capabilities and system administration utilities.

    Overview of the IRC Server Script

    The script provided in this article is a fundamental implementation of an IRC server using Perl. It handles basic IRC commands such as NICK, USER, JOIN, PART, PRIVMSG, and others. This server can accommodate multiple clients, allowing them to join channels, send messages, and perform other standard IRC operations.

    1. Prerequisites

    Before diving into the script, ensure you have the following:

    • Perl: Installed on your system. Perl is available on most UNIX-like systems, and you can download it for other platforms.
    • Basic Understanding of IRC: Familiarity with IRC concepts like channels, nicks (nicknames), and commands.
    • Network Programming Knowledge: Understanding sockets and basic network programming will help you grasp the concepts used in this script.

    2. Script Breakdown

    Let’s break down the script into manageable parts to understand its functionality better.

    2.1 Importing Necessary Modules

    use strict;
    use warnings;
    use IO::Socket::INET;
    use IO::Select;
    use Net::DNS;

    Here, we import essential Perl modules:

    • IO::Socket::INET: Manages TCP/IP socket connections.
    • IO::Select: Monitors multiple file descriptors, allowing the server to handle multiple clients concurrently.
    • Net::DNS: Performs DNS lookups, demonstrating the server's capability to resolve domain names.

    2.2 Server Configuration

    my $server_port = 6667;
    my $server_name = 'localhostd';
    my %channels;
    my %clients;
    my $select = IO::Select->new();
    • $server_port: The port on which the IRC server will listen for connections. 6667 is the standard port for IRC.
    • $server_name: The name of the IRC server.
    • %channels: Stores information about the IRC channels.
    • %clients: Keeps track of connected clients.
    • $select: Used to manage multiple socket connections.

    2.3 Creating the Server Socket

    my $server_socket = IO::Socket::INET->new(
        LocalPort => $server_port,
        Type      => SOCK_STREAM,
        Reuse     => 1,
        Listen    => 10
    ) or die "Couldn't open socket on port $server_port: $!";

    This part initializes a TCP socket that listens for incoming connections on the specified port. The socket is configured to allow address reuse and to listen for up to 10 simultaneous connections.

    2.4 Handling Connections

    $select->add($server_socket);
    print "IRC Server started on port $server_port\n";
    
    while (1) {
        my @ready = $select->can_read();
        foreach my $socket (@ready) {
            if ($socket == $server_socket) {
                my $client_socket = $server_socket->accept();
                my $client_address = $client_socket->peerhost();
                my $client_port = $client_socket->peerport();
                # Add client handling code here...
            } else {
                handle_client($socket);
            }
        }
    }
    • $select->add($server_socket): Adds the server socket to the list of sockets that IO::Select monitors.
    • @ready = $select->can_read(): Retrieves a list of sockets ready for reading.
    • $server_socket->accept(): Accepts an incoming client connection and creates a new socket for that client.
    • handle_client($socket): A subroutine that handles communication with connected clients.

    2.5 Handling Client Commands

    The handle_client subroutine processes various IRC commands from clients. Let’s examine some of the key commands:

    • NICK: Sets the nickname for a client.

      if ($line =~ /^NICK\s+(\S+)/) {
        my $nick = $1;
        $client_info->{nick} = $nick;
        print $client_socket ":$server_name 001 $nick :Welcome to $server_name, $nick\n";
      }
    • USER: Sets the user information for a client.

      elsif ($line =~ /^USER\s+(\S+)\s+\S+\s+\S+\s+:(.*)/) {
        my $user = $1;
        my $realname = $2;
        $client_info->{user} = $user;
        $client_info->{realname} = $realname;
      }
    • JOIN: Allows a client to join a channel.

      elsif ($line =~ /^JOIN\s+(#\S+)/) {
        my $channel = $1;
        push @{$client_info->{channels}}, $channel;
        $channels{$channel}->{$client_socket} = $client_info->{nick};
        print $client_socket ":$server_name 332 $client_info->{nick} $channel :Welcome to $channel\n";
      }
    • PRIVMSG: Sends a private message to another client or channel.

      elsif ($line =~ /^PRIVMSG\s+(\S+)\s+:(.*)/) {
        my $target = $1;
        my $message = $2;
        # Broadcasting message logic
      }
    • PING/PONG: Keeps the connection alive by responding to PING requests.

      elsif ($line =~ /^PING\s+(.*)/) {
        print $client_socket "PONG $1\n";
      }

    2.6 Additional Features

    The server also supports additional features like DNS lookups and DCC (Direct Client-to-Client) file transfers, which are beyond the basics but demonstrate Perl's flexibility in handling more complex tasks.

    2.7 Handling Client Disconnections

    elsif ($line =~ /^QUIT/) {
        print $client_socket "QUIT :Client disconnected\n";
        $select->remove($client_socket);
        close($client_socket);
        delete $clients{$client_socket};
    }

    When a client sends a QUIT command, the server cleans up by removing the client from the list of active connections, closing the socket, and freeing up resources.

    3. Conclusion

    This Perl-based IRC server is a basic but functional example of how you can implement an IRC server. It handles multiple clients, supports standard IRC commands, and demonstrates Perl's powerful networking capabilities. While this script is just the beginning, it can be expanded with more features, such as authentication, advanced channel management, and logging.

    Building an IRC server from scratch is a great way to deepen your understanding of network protocols, socket programming, and Perl itself. Whether you're a seasoned developer or just starting, this project offers a valuable hands-on experience in creating real-time communication systems.

  • KreatyveBot #1

    Introduction

    git clone https://github.com/ringsce/kreatyveBot.git
    

    This article explores a simple IRC bot written in Perl. The bot connects to an IRC server, joins specific channels, and listens for commands issued by its owner. With this guide, you’ll understand how the bot operates, the purpose of each section of the script, and how it can be customized or extended for various uses.

    Overview of the Script

    The script uses the Perl language and standard libraries to interact with an IRC server. It includes features such as detecting installed programs, running shell commands, managing channel operations (like kicking or banning users), and executing scripts. Let’s break down the script step by step.

    Setting Up the Environment

    The script begins with a standard shebang line and the inclusion of necessary Perl modules:

    #!/usr/bin/perl
    use strict;
    use warnings;
    use IO::Socket;
    • #!/usr/bin/perl: Tells the system to execute the script using Perl.
    • use strict; use warnings;: Enforces good programming practices, helping to avoid common mistakes.
    • use IO::Socket;: Imports the IO::Socket module, which provides networking capabilities necessary for connecting to the IRC server.

    Configuring Server and User Variables

    Next, the script defines several variables to configure the bot’s connection to the IRC server:

    my $server   = "irc.libera.chat";
    my $port     = 6667;
    my $nick     = "KreatyveBot";
    my $ident    = "Anonymous";
    my $realname = "Anonymous";
    my $chan     = "#channel1";
    my $chan2    = "#channel2";
    my $pass     = "";
    my $su       = "nickname";
    my $owners   = "nickname";
    • $server and $port: Define the IRC server’s address and port.
    • $nick, $ident, and $realname: Set the bot’s nickname, identification, and real name as they will appear on IRC.
    • $chan and $chan2: Specify the channels the bot will join.
    • $pass: Placeholder for the NickServ password (if authentication is required).
    • $su and $owners: Designate the nickname(s) of the bot’s superuser or owner, who can issue privileged commands.

    Connecting to the IRC Server

    The script then establishes a connection to the IRC server:

    my $irc = IO::Socket::INET->new(
        PeerAddr => $server,
        PeerPort => $port,
        Proto    => 'tcp'
    ) or die "Unable to connect to server: $!";
    • IO::Socket::INET->new(...): Creates a new TCP socket connection to the IRC server using the provided address and port. If the connection fails, the script will terminate with an error message.

    Logging into the IRC Server

    Once connected, the bot identifies itself and joins the specified channels:

    print "$nick has connected to $server on $chan and $chan2\n";
    print $irc "USER $ident $ident $ident $ident :$realname\n";
    print $irc "NICK $nick\n";
    print $irc "JOIN $chan\n";
    print $irc "JOIN $chan2\n";
    • print $irc "USER ..." and print $irc "NICK ...": Send the USER and NICK commands to the IRC server, setting the bot’s identification and nickname.
    • print $irc "JOIN $chan": Commands the bot to join the specified channels.

    Command Center Notification and Utility Functions

    The bot notifies the owner of its presence and checks for certain installed programs:

    print $irc "PRIVMSG $owners :I AM SCORPION'S BIGGEST FAN\n";
    my $output = `whoami`;
    print $irc "PRIVMSG $owners : $output\n";
    
    sub program_exists {
        my $program = shift;
        foreach my $path (split /:/, $ENV{PATH}) {
            if (-x "$path/$program") {
                return 1;
            }
        }
        return 0;
    }
    • PRIVMSG $owners: Sends a private message to the bot’s owner.
    • whoami: Executes the whoami command to determine the current user and reports it to the owner.
    • program_exists: A subroutine that checks if a specific program exists in the system’s PATH by iterating over the directories listed in $ENV{PATH}.

    Command Handling Loop

    The script enters an infinite loop to continuously listen for incoming messages from the server:

    while (my $in = <$irc>) {
        if ($in =~ /^PING(.*)/) {
            print $irc "PONG $1\n";
        }
    
        print "$in\n"; # Log all incoming messages
        next unless $in =~ /^:$owners\b/;
    • $in = <$irc>: Reads each line of input from the IRC server.
    • /^PING(.*)/: Responds to server PING requests to keep the connection alive.
    • /^:$owners\b/: Ensures that commands are only executed if they originate from the bot’s owner.

    Executing Commands

    The bot can execute a variety of commands, such as retrieving the current user (!whoami), listing network interfaces (!ifconfig), and more:

    if ($in =~ /!whoami/) {
        $output = `whoami`;
        print $irc "PRIVMSG $owners : $output\n";
    }
    
    if ($in =~ /!ifconfig/) {
        my @output = `ifconfig | grep inet`;
        foreach my $line (@output) {
            print $irc "PRIVMSG $owners : $line\n";
        }
    }
    
    if ($in =~ /!command\s+(.*)/) {
        my @output = `$1`;
        foreach my $line (@output) {
            print $irc "PRIVMSG $owners : $line\n";
        }
    }
    • !whoami: Executes the whoami command and sends the output to the owner.
    • !ifconfig: Runs ifconfig to retrieve network interface information and sends each line of output to the owner.
    • !command: Allows the owner to execute arbitrary shell commands and receive the output.

    Additional Functionalities

    The bot supports various IRC operations, including:

    • !op and !deop: Grant or revoke operator privileges.
    • !kickban, !ban, and !kick: Manage user bans and kicks.
    • !say: Send a message to the channel.
    • !quit: Quit the IRC server.
    • !nick: Change the bot’s nickname.
    • !restart: Restart the bot.
    • !users: Display the current admins.
    • !get: Open a donation URL in the browser.
    • !run: Run specific Perl or compiled Pascal scripts.

    Handling Topics and Quitting

    The script also includes commands to update the channel topic and to quit gracefully:

    if ($in =~ /!topic\s+(.*)/) {
        my $topic = $1;
        print $irc "TOPIC $chan :$topic\n";
        print $irc "TOPIC $chan2 :$topic\n";
    }
    
    if ($in =~ /!quit/ && $in =~ /$su/) {
        print $irc "PRIVMSG $chan :I'LL BE BACK FOR YOU\n";
        print $irc "QUIT\n";
        last;
    }
    • !topic: Updates the topic for the specified channels.
    • !quit: Exits the IRC server and stops the bot.

    Closing the Connection

    Finally, the bot closes the connection to the IRC server:

    close($irc);

    Conclusion

    This Perl script provides a basic yet powerful foundation for an IRC bot, capable of handling commands, executing scripts, and interacting with users on the IRC network. By understanding each section of the script, you can customize it to suit your needs, adding new features or modifying existing ones to create a fully functional IRC bot tailored to your requirements.

  • ringsCE #6

    Hello readers,

    We are going to learn how to use SSH on a FreeBSD 14.1 ARM64 system running within UTM on macOS Sonoma. Secure Shell (SSH) is a powerful tool for managing and interacting with remote systems securely over a network. By the end of this guide, you'll have a solid understanding of how to set up and use SSH to connect to your FreeBSD virtual machine, enabling you to manage it efficiently from your macOS Sonoma environment. Let's get started!

    As you can see you must use:

    ifconfig -a

    This will prompt you to an IP address. For me on my network gave this IP address.

    Now, we must install sshd:

    pkg install --yes sshd
    sysrc sshd start
    
    sysrc sshd_enable="YES"
    rc-update add. shhd boot
    

    This must be done as root not user with sudo or sudoers enable.

  • ringsCE #5 (En Castellano)

    Bienvenidos a la quinta edición de ringsCE, tu fuente principal para los últimos avances y conocimientos sobre el marco ringsCE. En esta edición, profundizamos en el aspecto crítico de la sincronización del código fuente y exploramos cómo ringsCE se integra perfectamente con macOS y el recién lanzado FreeBSD 14. Nuestro enfoque sigue siendo fomentar un entorno de desarrollo abierto y colaborativo, impulsado por los versátiles lenguajes de D, ANSI C, y los robustos marcos de Qt 5 y 6.

    A medida que el desarrollo de software evoluciona, la sincronización del código fuente entre diferentes plataformas se vuelve cada vez más crucial. Esta edición proporciona una visión detallada de las metodologías y herramientas que facilitan esta sincronización, asegurando consistencia, fiabilidad y eficiencia en tus procesos de desarrollo. Al aprovechar las fortalezas de macOS y FreeBSD 14, ringsCE continúa ampliando sus capacidades, ofreciendo a los desarrolladores un marco más integrado y cohesivo.

    Además, nos enfocaremos en utilizar las APIs del sistema desde pipelines UNIX y otras herramientas esenciales dentro de D, ANSI C y Qt. Aprenderás técnicas de codificación prácticas que aprovechan el poder de estas APIs, permitiéndote crear aplicaciones eficientes y efectivas. Este enfoque práctico te guiará a través de las complejidades de la programación a nivel de sistema, facilitando la integración y gestión de procesos complejos dentro del marco ringsCE.

    Descubre cómo el compromiso de ringsCE con la apertura y la compatibilidad multiplataforma mejora tu flujo de trabajo de desarrollo, ya sea que estés trabajando en un Mac o explorando las características robustas de FreeBSD 14. Únete a nosotros mientras desvelamos las innovaciones y mejoras que hacen de ringsCE una elección poderosa para el desarrollo de software moderno.

    Empezando: Clonación de Fuentes y Preparación para el Desarrollo de Pipelines del Sistema y Código de Controladores

    Bienvenido a esta guía práctica sobre cómo comenzar con el marco ringsCE clonando repositorios de código fuente. En este artículo, te guiaremos a través del proceso de verificar las fuentes desde los repositorios SVN y Git. Esto servirá como tu base para desarrollar pipelines del sistema y nuevo código de controladores para macOS y FreeBSD 14.

    Para empezar, necesitarás clonar los repositorios de código fuente necesarios. Sigue estos pasos para obtener el código en tu máquina local:

    Clonando el Código Fuente desde SVN

    Primero, usaremos SVN para verificar el código fuente de Open Krita. Abre tu terminal y ejecuta el siguiente comando:

    svn checkout https://svn.code.sf.net/p/openkrita/code/ openkrita-code

    Este comando creará un directorio llamado openkrita-code y descargará el código fuente completo desde el repositorio SVN especificado en este directorio. Asegúrate de tener SVN instalado en tu sistema antes de ejecutar el comando.

    Clonando el Código Fuente desde Git

    A continuación, clonaremos el espejo del código fuente de FreeBSD usando Git. En tu terminal, ejecuta el siguiente comando:

    git clone https://github.com/ringsce/freebsd-src-mirror.git

    Esto creará un directorio llamado freebsd-src-mirror y clonará el repositorio en él. Asegúrate de tener Git instalado en tu sistema para realizar esta operación.

    Preparándote para Codificar

    Con ambos repositorios de código clonados, ahora tienes un punto de partida sólido para tu trabajo de desarrollo. Estos repositorios contienen código y recursos esenciales que te ayudarán a construir pipelines del sistema y desarrollar nuevo código de controladores para macOS y FreeBSD 14.

    En nuestro próximo artículo, profundizaremos en la construcción de pipelines del sistema. Exploraremos cómo aprovechar el poder de los pipelines UNIX y otras APIs del sistema utilizando D, ANSI C y Qt. Además, te guiaremos a través del proceso de escribir e integrar nuevo código de controladores, asegurando una compatibilidad perfecta con macOS y FreeBSD 14.

    Mantente atento mientras seguimos mejorando tus habilidades de desarrollo con tutoriales prácticos y conocimientos profundos sobre el marco ringsCE. Ya seas un desarrollador experimentado o recién estés comenzando, estas guías te proporcionarán el conocimiento y las herramientas que necesitas para tener éxito.

  • ringsCE #4 (En Castellano)

    Hola lectores,

    Hoy vamos a aprender a usar VSCode con D. Vamos a ver cómo usar las bibliotecas y sus enlaces simbólicos para VSCode en macOS.

    Bienvenidos a ringsCE

    En ringsCE, estamos a la vanguardia de la innovación en el mundo de los videojuegos y el desarrollo, combinando el poder de los lenguajes C y D para crear soluciones robustas y eficientes. Nuestra misión es ofrecer productos y servicios excepcionales que satisfagan las diversas necesidades de desarrolladores y jugadores por igual.

    La Convergencia de los Lenguajes C y D

    El lenguaje C, conocido por su rendimiento y control, ha sido un pilar en la comunidad de desarrollo durante décadas. D, por otro lado, es un lenguaje moderno que se basa en las fortalezas de C, mientras introduce características avanzadas como la recolección de basura, concurrencia y un poderoso sistema de tipos. En ringsCE, aprovechamos la sinergia de C y D para desarrollar soluciones que son tanto de alto rendimiento como fáciles de mantener.

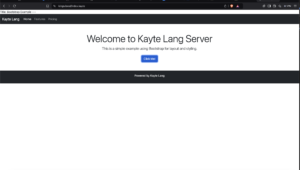
    Desarrollo Frontend de Vanguardia con vibe.d

    Para mejorar nuestras ofertas, utilizamos vibe.d, un marco web de alto rendimiento para el lenguaje D. Con vibe.d, entregamos aplicaciones frontend sofisticadas para los servicios en la nube de ringsCE, asegurando una experiencia de usuario fluida y receptiva. Esta combinación nos permite crear aplicaciones web dinámicas, escalables y seguras que cumplen con los más altos estándares del desarrollo moderno.

    Nuestros Servicios

    Juegos

    Descubre una amplia gama de juegos en diversos géneros y plataformas, seleccionados para ofrecer la mejor experiencia de juego.

    Soluciones de Desarrollo

    Aprovecha nuestra experiencia en los lenguajes C y D para acceder a:

    Desarrollo Personalizado: Soluciones a medida para satisfacer tus necesidades específicas.
    Módulos Preconstruidos: Componentes de código listos para usar que agilizan la entrega de proyectos.
    Servicios de Consultoría: Asesoramiento profesional para optimizar tu proceso de desarrollo.
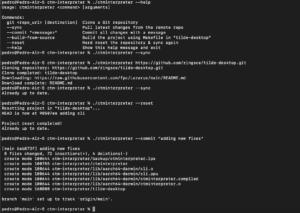
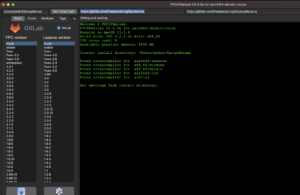
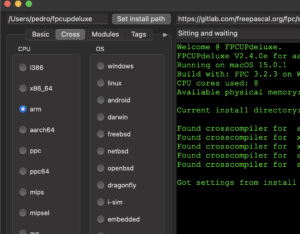
    Para agilizar tu flujo de trabajo de desarrollo y asegurar que tengas fácil acceso a herramientas esenciales, puedes crear enlaces simbólicos para el compilador LDC y DUB, el gestor de paquetes del lenguaje D, directamente en el directorio local bin de tu sistema. Esto te permite invocar estas herramientas desde cualquier lugar en tu terminal sin necesidad de especificar sus rutas completas.

    Configuración de Enlaces Simbólicos

    Para configurar los enlaces simbólicos para el compilador LDC y DUB, utiliza los siguientes comandos:

    Enlace para el Compilador LDC:

    sudo ln -f -s /ruta/al/compilador/ldc/bin/ldc2 /usr/local/bin/ldc2

    Este comando crea un enlace simbólico para el compilador ldc2, haciéndolo accesible en todo el sistema como ldc2. La opción -f fuerza la creación del enlace eliminando cualquier archivo de destino existente, y la opción -s indica que debe crearse un enlace simbólico.

    Enlace para DUB:

    sudo ln -f -s /ruta/al/compilador/ldc/bin/dub /usr/local/bin/dub

    De manera similar, este comando crea un enlace simbólico para dub, permitiéndote ejecutarlo desde cualquier directorio con facilidad. Al igual que el comando anterior, la opción -f fuerza la creación del enlace y la opción -s especifica que debe ser un enlace simbólico.

    Beneficios

    Al ejecutar estos comandos, aseguras que tanto ldc2 como dub estén disponibles desde la línea de comandos, simplificando el proceso de desarrollo. Esta configuración es particularmente útil para proyectos que implican tareas frecuentes de compilación y gestión de paquetes, permitiendo un desarrollo más eficiente y organizado.

    Ejecuta estos comandos en tu terminal para optimizar tu entorno de desarrollo en el lenguaje D:

    sudo ln -f -s /ruta/al/compilador/ldc/bin/ldc2 /usr/local/bin/ldc2
    sudo ln -f -s /ruta/al/compilador/ldc/bin/dub /usr/local/bin/dub

    Con estos enlaces simbólicos en su lugar, puedes aprovechar al máximo el compilador LDC y el gestor de paquetes DUB, mejorando tu productividad y facilidad de uso.

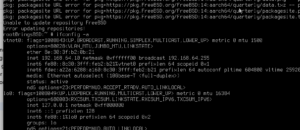
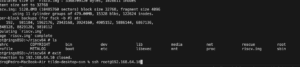
    Como puedes ver en VSCode para macOS, estamos trabajando en un MBAir Sonoma con M2.

  • ringsCE #3 (En Castellano)

    Kreatyve Designs: Pioneros en Aplicaciones de Sistema a Nivel POSIX con C y D

    En Kreatyve Designs, estamos comprometidos con empujar los límites del desarrollo de software aprovechando el poder de las tecnologías de vanguardia. Nuestro último esfuerzo implica construir aplicaciones robustas a nivel de sistema POSIX utilizando el dinámico dúo de los lenguajes de programación C y D.

    ¿Por qué POSIX?

    POSIX (Portable Operating System Interface) es una familia de estándares especificados por el IEEE para mantener la compatibilidad entre sistemas operativos. Define la interfaz de programación de aplicaciones (API), junto con shells de línea de comandos e interfaces de utilidades, para garantizar la portabilidad del software a través de diferentes sistemas operativos tipo Unix. Al adherirse a los estándares POSIX, Kreatyve Designs asegura que nuestras aplicaciones sean versátiles, confiables y compatibles con una amplia gama de plataformas.

    El Poder de C y D

    C: El Comprobado y Verdadero

    C ha sido durante mucho tiempo la piedra angular de la programación a nivel de sistema. Su naturaleza cercana al hardware permite un control minucioso sobre los recursos del mismo, lo que lo convierte en la elección ideal para desarrollar software de sistema de alto rendimiento, eficiente y confiable. El uso extensivo de C en sistemas operativos, compiladores y sistemas embebidos es un testimonio de su poder y flexibilidad duraderos.

    D: La Maravilla Moderna

    Aunque C sigue siendo indispensable, D aporta una perspectiva fresca a la programación a nivel de sistema. D está diseñado para combinar el rendimiento y control de C con la productividad y facilidad de los lenguajes de programación modernos. Con características como recolección de basura, programación por contratos y una robusta biblioteca estándar, D simplifica muchas de las complejidades inherentes a la programación a nivel de sistema. Su interoperabilidad con el código C lo convierte en un compañero perfecto para desarrollar aplicaciones avanzadas compatibles con POSIX.

    Cómo Utiliza Kreatyve Designs C y D

    En Kreatyve Designs, aprovechamos las fortalezas de C y D para construir potentes aplicaciones compatibles con POSIX. Así es cómo lo hacemos:

    Integración de Llamadas al Sistema

    Nuestras aplicaciones requieren una interacción eficiente y directa con el sistema operativo. Al utilizar llamadas al sistema POSIX, aseguramos que nuestras aplicaciones puedan realizar tareas críticas como control de procesos, manipulación de archivos y comunicación entre procesos sin problemas a través de diferentes sistemas tipo Unix.

    Por ejemplo, aquí hay un ejemplo simple de una llamada al sistema POSIX en D:

    import core.sys.posix.unistd;
    
    void main() {
        ssize_t bytesWritten = write(STDOUT_FILENO, "Hello, POSIX!\n", 14);
        if (bytesWritten == -1) {
            // Manejar error
        }
    }

    Este fragmento de código demuestra cómo D puede interactuar con la API POSIX para realizar una operación básica de escritura en la salida estándar.

    Combinando C y D

    Una de las características destacadas de D es su interoperabilidad con C. Esto nos permite usar bibliotecas y bases de código existentes de C sin problemas dentro de nuestras aplicaciones en D. Al combinar el poder bruto de C con las características modernas de D, podemos crear aplicaciones a nivel de sistema más mantenibles y escalables.

    Por ejemplo, podríamos usar C para componentes críticos en rendimiento y D para la lógica de nivel superior, beneficiándonos de la sintaxis moderna y las poderosas abstracciones de D:

    // Código en C (system_calls.c)
    #include <unistd.h>
    
    void c_write(const char *message) {
        write(STDOUT_FILENO, message, sizeof(message));
    }
    // Código en D (main.d)
    extern(C) void c_write(const char* message);
    
    void main() {
        c_write("Hello from C!\n");
    }

    Características Avanzadas y Productividad

    Las características avanzadas de D, como la recolección de basura, el sistema de módulos y las poderosas capacidades de metaprogramación, nos permiten escribir código más limpio y robusto. Esto mejora la productividad y permite a nuestros desarrolladores enfocarse en resolver problemas complejos en lugar de lidiar con intricaciones de bajo nivel.

    Conclusión

    En Kreatyve Designs, creemos en la sinergia de la tradición y la innovación. Al combinar la fiabilidad comprobada de C con la elegancia moderna de D, estamos creando aplicaciones a nivel de sistema POSIX de última generación que son tanto poderosas como adaptables. A medida que continuamos explorando las posibilidades, estamos emocionados de ofrecer soluciones de software que cumplan con los más altos estándares de rendimiento, compatibilidad y fiabilidad.

    ¡Permanece atento para más actualizaciones sobre nuestro viaje con C y D en el mundo de la programación de sistemas POSIX!

coder by Gleentech
Privacy Overview

This website uses cookies so that we can provide you with the best user experience possible. Cookie information is stored in your browser and performs functions such as recognising you when you return to our website and helping our team to understand which sections of the website you find most interesting and useful.